
Overview:
The Account preferences screen is
used to setup account specific behavior. A Default Account is used to set the behavior for all accounts that do not
have a preference specifically set up in this screen. This screen is accessed using the Setup menu Account Preferences option.
System Wide Preferences
When the Account / Template drop-down is set to Default, an extra column appears in the right list. If the Preference is marked with an * it denotes that the setting is not available at the account level but is only a system wide setting. Those preference will not appear when an actual account is selected.
Group Names:
- ASN Export
- ASN Import
- Bill of Lading
- FTP
- Invoice
- Logging
- Packing
- Packing Slip
- Pallet
- Pallet BOL
- Pallet Export
- Pallet Import
- Pick Sheet
- Product Dimensions
- Product Import
- Products
- Receiving
- Screens
- Shipment
- Shipment Export
- Shipment Import
- Trucking Contract
- Web Reports
Fields:
- Account / Template: Select the Account. It contains a –Default- Account that can be used to set the behavior for all accounts that do not have a preference specifically set up in this screen.
- Group Section:
- Group Name: The Group of settings. Select the group to display settings specific to the Group Name.
- Settings Section: Contains a listing of the settings specific to the Account selected in the Account / Template drop down.
- Preference: Contains the specific Preference that can be set for an Account.
- Setting: Contains the specific Setting that will be used for the Account.
- Default: Specifies if the setting is defaulting from the –Default- Account or if the setting has specifically been overridden for the Account.
- Default = Y: The Preference has not specifically been set for the Account and is using the Default.
- Default = N: The Preference has been set specific to this Account and overrides the default setting.
- New Value: Displays the value (setting) for the Preference selected in the Settings Section. To change a Setting, select a Preference, Enter the New Value or choose it from the drop down list, and click the Update Setting button.
Buttons:
- Copy: Used to copy preferences from one account to another account. All preferences will be copied.
- Update Setting: Used to change the Setting of a preference.
- Done: Used to exit the screen.
WEB REPORTING (back to top)
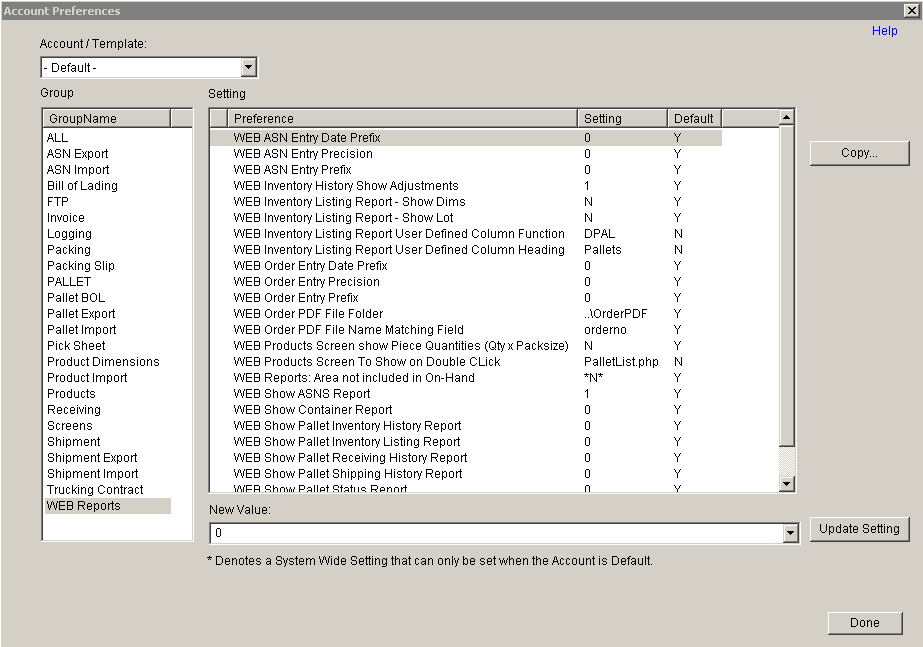
3PL – Update 22 Init 25
- WEB Inventory Listing Report User Defined Column Function
- Controls a user definable column on the Web Inventory Listing Report that allows the inventory to be displayed in units other than those it is being kept in. The columns heading may be designated using the next preference. Functions allowed include:
- None
- This column is not used on the Report
- Divide By Packsize
- Divides the inventory qty by the product's Packsize. Used when inventory is in eaches and cartons need to be displayed.
- Divide By Master Packsize
- Divides the inventory qty by the product's Master Packsize. Used when inventory is in eaches and master cartons need to be displayed.
- Divide By Pallet Qty
- Divides the inventory qty by the product's Pallet Qty. Used when inventory is in eaches or cartons and pallets need to be displayed.
- Multiply by Packsize
- Multiplies the inventory qty by the product's Packsize. Used when inventory is in cartons and eaches must be displayed.
- Multiply by Master Packsize
- Multiplies the inventory qty by the product's Master Packsize. Used when inventory is in master cartons and eaches must be displayed.
- None
- Controls a user definable column on the Web Inventory Listing Report that allows the inventory to be displayed in units other than those it is being kept in. The columns heading may be designated using the next preference. Functions allowed include:
- WEB Inventory Listing Report User Defined Column Heading
- Column name for the user definable field on the Inventory Listing Report.
- for example: Cartons, Pallets, Eaches, etc.
- Column name for the user definable field on the Inventory Listing Report.
- WEB Order PDF File Folder
- Enter the folder where the Order or BOL PDF Files will be kept.
- WEB Order PDF File Name Matching Field
- Select the order field that you will use for the name of the PDF file.
- CFX order #
- Pick Ticket
- Customer PO
- BOL #
- WEB Products Screen show Piece Quantities (Qty x Packsize)
- Make the Web - Products Report Quantity Columns change to show the original quantity times the product pack size. The Column Names get “pcs” added to the end of them (i.e. ONHAND becomes ONHAND pcs). ONHAND also shows as ONHAND “ctns” for cartons.
- WEB Products Screen to Show on Double Click.
- Determines the screen to display when a line is double clicked on the WEB Products Report.
- Inventory History. Displays the history of the products inventory movements.
- Pallet
Listing. Requires Feature Pallet
Tracking. Displays a List of the
Pallets on hand and UPC Code(s) for the Product.
- WEB Reports: Area Not Included in On Hand
- Enter an Area to exclude from the on hand totals in the Wen Reports. Web Reports effected are:
- WEB Show Export Button on Reports with Inventory
- If this is set to No, the Export Button will not be displayed on the following Report:
- Web Products
- Web Inventory Listing
- Web Inventory Listing by Lot
- If this is set to No, the Export Button will not be displayed on the following Report:
LOGGING (back to top)

Update 22 Init 23
- Log Inventory Daily
- When set to Yes the inventory for the Account will be logged every day. This is generally done for accounts using Days Billing.
- Pallet Inventory Log from History Weight Source
- Determines where the weight comes from when logging from history on the Inventory Logging screen..
- Product
- The weight will be set to the weight in the product master.
- Pallet
- The weight comes from the weight in the pallet.
- Product
- Determines where the weight comes from when logging from history on the Inventory Logging screen..
PALLET (back to top)

Update 22 Init 13
- Populate Pre-Receipt Screen from Product Map 1 Pallet Field
- Requires Feature Pallet Tracking.
- This setting is used in conjunction with the Populate Pre-Receipt Screen from Product Map 1 Pallet Field setting to determine which product field to map into which pallet field when a product is selected on the Pallet Tracking – Pre-Receive tab.
- The default is None. If either setting for this map is set to None then no field will be mapped.
- The Product field’s data will be mapped into the Pallet Field on the screen.
- For example, to map the product’s packsize into the Pre-Receive screens Size field, set the settings as follows:
- Populate Pre-Receipt Screen from Product Map 1 Product Field – Packsize
- Populate Pre-Receipt Screen from Product Map 1 Pallet Field – Size (user_defined3)
- Pallet Account (Y or N)
- Set this to Y if you are using the Pallet Tracking Module and the account is a Pallet account. It is used throghout the system for screens and processes to operate differently. For example it affects Inventory Logging, Web Reporting as well as other functions.
- Populate Pre-Receipt Screen from Product Map 1 Product Field
- See the instructions for the Populate Pre-Receipt Screen from Product Map 1 Pallet Field Account Pref.
SHIPMENT IMPORT (back to top)

Update 22 Init 13
- Apply Confirmation Custom Select
- This specifies a file to use to create a custom Apply Confirmation File.
- For an Apply Confirmation file to be generated, you must specify a File Folder and Name in the settings below.
- This should be the file name and extension (ie Custom_ApplyConf.sql)
- Apply Confirmation File Folder
- This specifies the folder or path where the Apply Confirmation file will be created (ie C:\ApplyConfirmations). Note that this folder is relative to the Database Server PC and not necessarily the pc that Coreflex is running on.
- Relative folders (ie ..\Exports) are not permitted.
- The folder must exist.
- Apply Confirmation File Name
- This specifies the beginning of the file name to be used for the Apply Confirmation file. It will be appended with the Customer Order #.
- For example, setting this to “ApplyConfirmation” will create a file ApplyConfirmation_1023212.csv.
- Custom
Order Import Parse File Name
- This is the custom import file name provided by Coreflex Support for a given account.
- When this field is not blank, the Account will be included on the Account Drop Down on the Customer Order Import screen.
- Error if Total Lines not correct
- Use Order # Generated by Coreflex for Imported Orders
SHIPMENT EXPORT (back to top)
 Update 22 Init 22
- Days to keep Exported Records
- Set this to the number of days before purging exported order records. Note that the orders will still be in the system, only the Export Records are purged.
- If this is set to 0, no records will be purged.
- Purging occurs when orders are exported using the Standard Order Export screen.
- This setting is only used for the Default Account.
- Enable Shipment Export
- Set this to yes to export orders using the Standard Order Export screen.
- Export Shipment in a Custom Format.
- Set this to yes to and the Order will not export with the Standard Order Export but will use the Custom Export screen instead. Note that a custom export file must be configured by Coreflex Support for that account.
- Roll Up Order Items by Lot
- This requires Feature Lot Tracking.
- It applies to the Order Flat Tnx only.
- This overrides the System Setting Orders: Export Consolidation by Order Line and, when set to Yes, will cause a one record per Productid-Lot. For example if an order line is filled by two separate lots, one line per lot will be in the export. If one of the lots is picked from multiple location, the qty picked for that lot will combined into a single line. Also, the quantity will be reported in the UOM of the SubItem 0 line.
- Standard Export File Name and Extension
- Determines the file naming convention for the Standard Export. You may use special characters to include the account # in the file name as follows:
- Order-Flat Tnx: Use &009 for the Account #
- For all other types Use &001 for the Account #
- It is reccomended to include a date time stamp so that the files do not get overwritten by subsequent exports. A Date Time stamp is added by including %Y%m%d_%H%M%S in the file name.
- Files may be put in seperate folder by account. For example, \&009\&009_OrderExport_%Y%m%d_%H%M%S.csv would save the file in a different folder per account for the Order-Flat Tnx Type. Note that all folders and sub-folders need to exist prior to exporting or an error will be displayed.
- Determines the file naming convention for the Standard Export. You may use special characters to include the account # in the file name as follows:
- Standard Export Include Header Rows
- If this is set to yes, the first row of the file will be a Header Row with column names.
- Set this to No to not include the Header Row.
- Note that the for Order-Flat Tnx the header row is always included regardless of the setting of this preference.
- Standard Export Type
- Determines the format of the standard export file.
- Order-Flat Tnx is a comma separated flat file with order and item level information.
- Order-Mulit Tnx is a comma separated file with order level and item level transaction types.
- Carton-Multi Tnx is a comma separated file including BOL, Order, Item, and Carton level Transaction types.
- Determines the format of the standard export file.
- Use Substitute Productid
- If this is set to yes, the Substitute Productid will be exported instead of the Coreflex Productid. The Substitute Product is replaced by an actual coreflex productid in the order import process and is stored in the order item to be used on export basd on the setting of this preference.
FTP (back to top)
Each Account has their own FTP specifications
Update 22 Init 16
- FTP Enable
Whether this account uses FTP or not
- FTP Local Directory to Download To
- Where incoming files from the FTP site are located on your local system before they are processed
- FTP Local Directory to Save files after Upload
Where outgoing files from your local system are moved to after successfully being uploaded to the FTP site
- FTP Password
The log in password required for the FTP site
- FTP Remote Directory to Download From
The directory on the FTP site that contains the files to download to your local system
- FTP Remote Directory to Upload To
The directory on the FTP site that outgoing files from your system will be uploaded to
- FTP Server Address
The address of the FTP site (URL address). This can be an IP address (as in the example) or a URL string such as ftp.myhost.com
- FTP User
The login user name required for the FTP site
INVOICE

Update 22 Init 16
- Bill Type 1 - 5 Minimum $ amount
- Sets the minimum total amount to be billed for this Bill Type. (If you want to set a minimum line charge, refer to the Min Inv Line Charge setting on the Add and Update Account screen.)
- The Coreflex bill will show the detail of the bill and the total will be forced to be the minimum amount.
- During the Export to QuickBooks, when you Create Invoices, Coreflex adds an adjusting entry to the invoice detail to balance the invoice. The productid added to the invoice is Invoice_Minimum-<Bill Category>. If the Bill Category is blank, the productid is Invoice_Minimum without a bill category. This product is automatically available and does not have to be set up in Coreflex and it does not have to be added to Invoice Services.
- Bill Type 1 - 5 Name
- Sets the Name or Title to be used on the Printed bill.
- Bill Type 1 - 5 Print Format
- Sets the Invoice Print Format for this Bill Type.
- Bill Terms
- Sets the Billing Terms to set on Bills generated for this account.
- Display Notice on WH Receipt for Pending Charges Past Due.
- Yes - A pop-up message box will be displayed when entering the Create Warehouse Receipt screen if there are any Pending Charges past their due date for the account.
- No - Pop-up will not be displayed.
- Pallet Receiving Inbound Charge No Bill Pallet Field and Value.
- This setting only works with Feature Pallet Tracking.
- These 2 settings are used in conjuction with each other to inihibit the Account, Product Type, and Product billing for a Receipt. In the first setting, enter the Pallet Field to be used to indicate whether or not to Bill for the Pallet. The second field holds the value the pallet field indicated in the first setting must be set to so that the Account, Product Type, or Product will not be applied.
- Account Charges (set up on the Charges to Apply screen) that are Auto Billed will still be applied on receipt.
SHIPMENT (back to top)

Update 22 Init 24
Allow Allocation of Partial Pre-Packs
- Yes - (default) Pre-Packs (order items with the same externalrefno) can be partially allocated.
- No - Pre-Packs will not be partially allocated. If any portion of the pre-pack is not available to allocate, none of the items will be allocated.
Calculate Carton Qty Using
- Packsize - Uses the Packsize from the product master to calculate the Carton Qty shipping on an order by dividing the Picked quantity by the packsize and rounding up if the UOM for the order line is in eaches (EA). If the order line is not in eaches, it uses the Picked quantity directly.
- Master Packsize - Uses the Master Packsize from the product master to calculate the Carton Qty shipping on an order by dividing the Picked quantity by the master packsize and rounding up is the UOM for the order line is in eaches (EA). If the order line is not in eaches, it uses the Picked quantity directly.
- The Carton Qty is set using this formula when the order is picked complete and may be reset either manually or by clicking the Calc button on the Packing screen.
End Customer Code Required
- No - (default) The End Customer Code for the order is not required.
- Yes - If the End Customer Code is not valued for an order, an error message will appear on the main order screens indicating it is blank. Also, the Print Shipping Label button is disabled on the Shipments - Pack Orders Screen. The End Customer Code may be valued using the Order Data screen.
- Yes - Must Exist - Works the same as Yes (above) with the additional requirement that the end customer code must exist in the End Customer Code table. The table may be updated using the Setup End Customers screen.
End Customer Code Required For UCC128 Label Printing
- No - (default) The End Customer Code for the order is not required.
- Yes - If the End Customer Code is not valued for an order, the Export Labels button is disabled on the Shipments - Pack Orders Screen. The End Customer Code may be valued using the Order Data screen.
Send
Email Confirmation On Shipment
- Yes - An email will be sent to the Bill-To Email address specified on the Setup Accounts Assign Address screen when an order is shipped. Also, the System Settings for the WH Email Site must be filled out:
- Email: WH Email Site
- Email: WH Email Login
- Email: WH Email Password
- No - Email is not sent.
Shipping Pallet Label print Form.
- Determines the Print format used when clicking Shipping Pallet Label on the Shipments – Pack Order Screen. The default is PalletLabel_Ship.
Packing Slip (back to top)
Update 22 Init 18
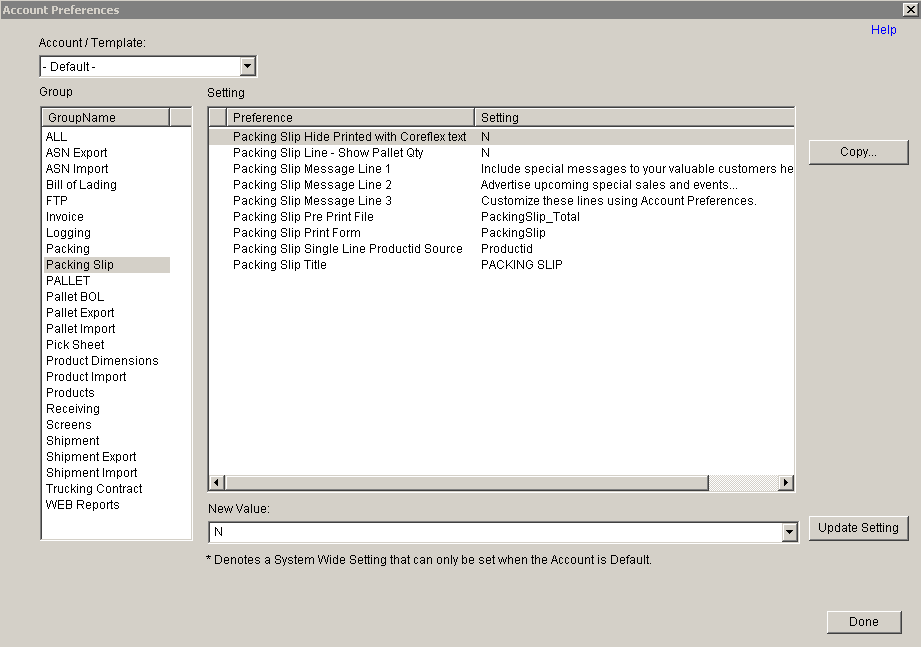
Packing Slip Message Lines 1 - 3
- Enter text to be displayed on the bottom of the Packing Slip
Packing Slip Single Line Productid Source
- Select the field to display in the Productid Column when the Packing Slip Print Form is set to PackingSlip_SingleLine. Choices are ProductId and the 10 Category Fields setup on the Search Products Screen.
Bill Of Lading (back to top)
Update 22 Init 19
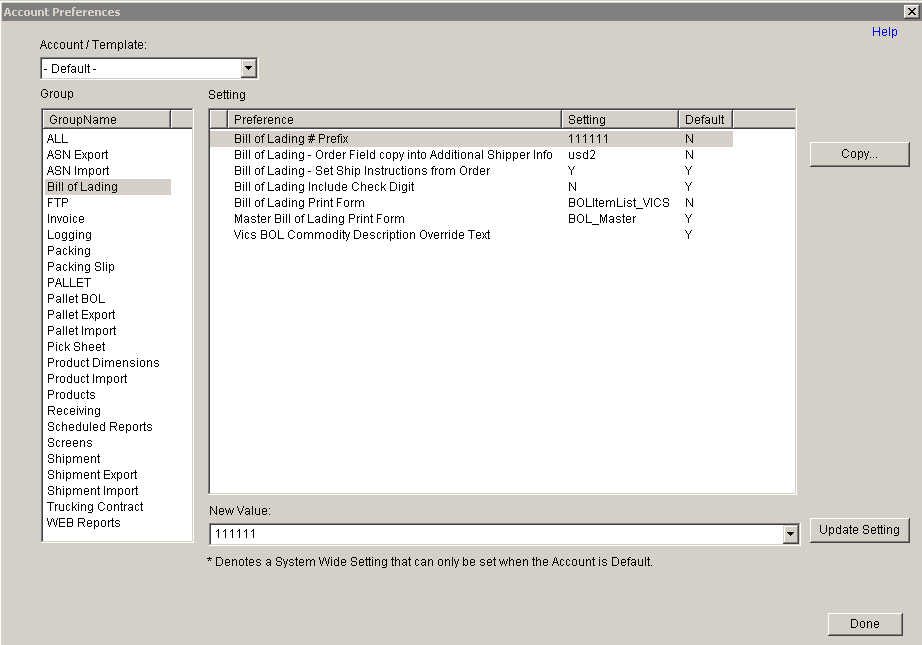
Bill of Lading # Prefix
- Prefix to be added to the BOL number for the account when a new BOL # is generated.
- This requires the System Setting: BOL: Assign BOL# Based on Account to be set to Yes.
- When the New BOL button is clicked, a Screen will appear requesting the account for the BOL to be selected and the account prefix displayed will be added to the BOL # generated.
- The second part of the BOL # is determined as usual using the System Settings: BOL: Bol Date Prefix, BOL prefix and BOL Precision.
Bill of Lading Print Form
- Format to be used when printing Bills of Lading
Master Bill of Lading Print Form
- When a Master Bill of Lading is created, this defines the format that the master bill of lading will print with.
Vics BOL Commodity Description Override Text
- If this preference is not blank, the text will be displayed in the Commodity Description of the Vics Bols BolitemList_Vics and ConsPalletBOL_Vics. Otherwise, product category1 or product category 4 (respectively) will be displayed in that field for those BOLs.
Bill of Lading Include Check Digit
- When this is set to Yes, a Vics Standard Check Digit will be added to the end of the Unique BOL # generated when a new BOL is generated. The calculation is based on a 16 digit BOL #, and is the amount needed to round up to the nearest multiple of 10 of the sum of the even digits multiplied by 3 plus the sum of the odd digits.
ASN Export (back to top)
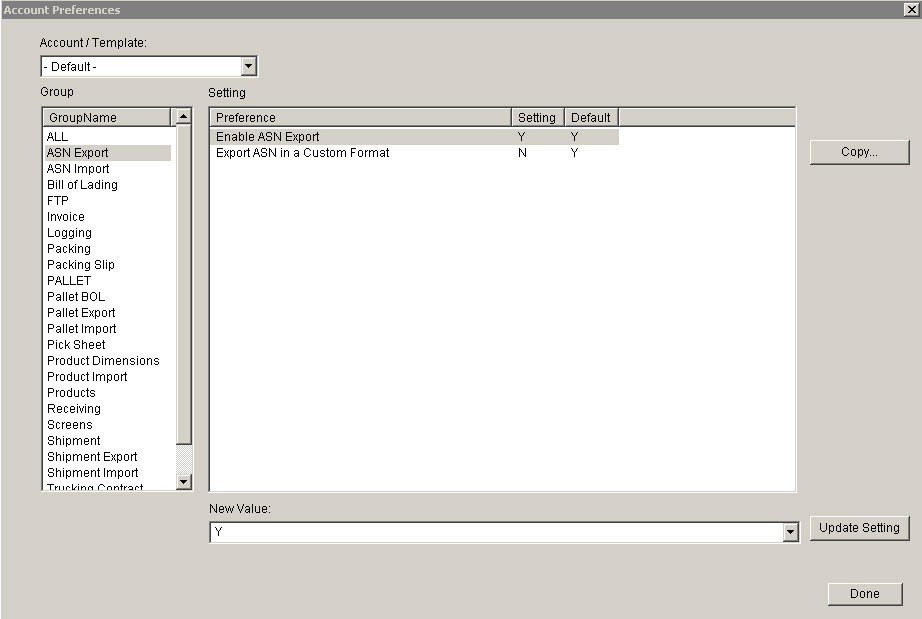
Update 22 Init 19
ASN Import (back to top)
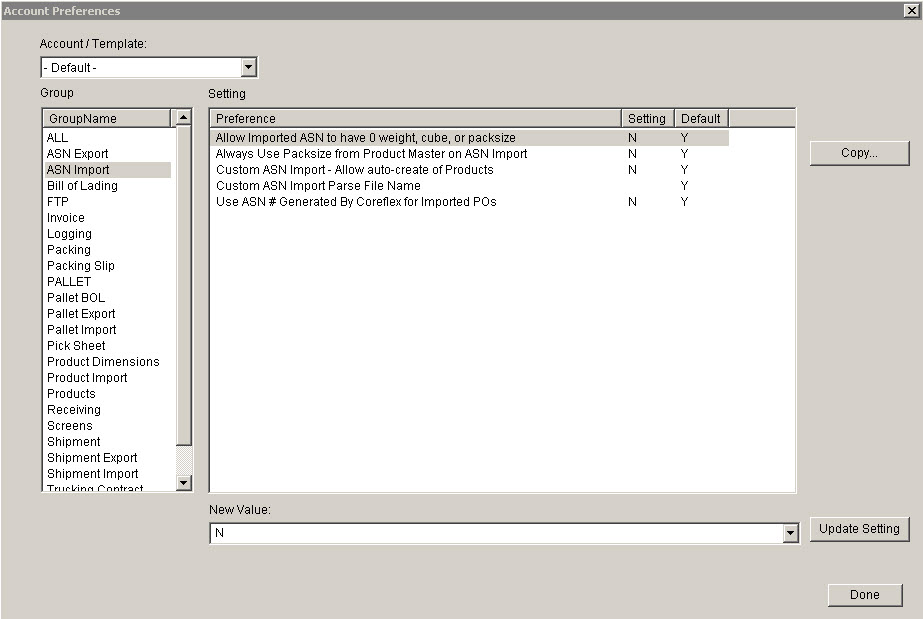
Update 22 Init 19
Packing (back to top)
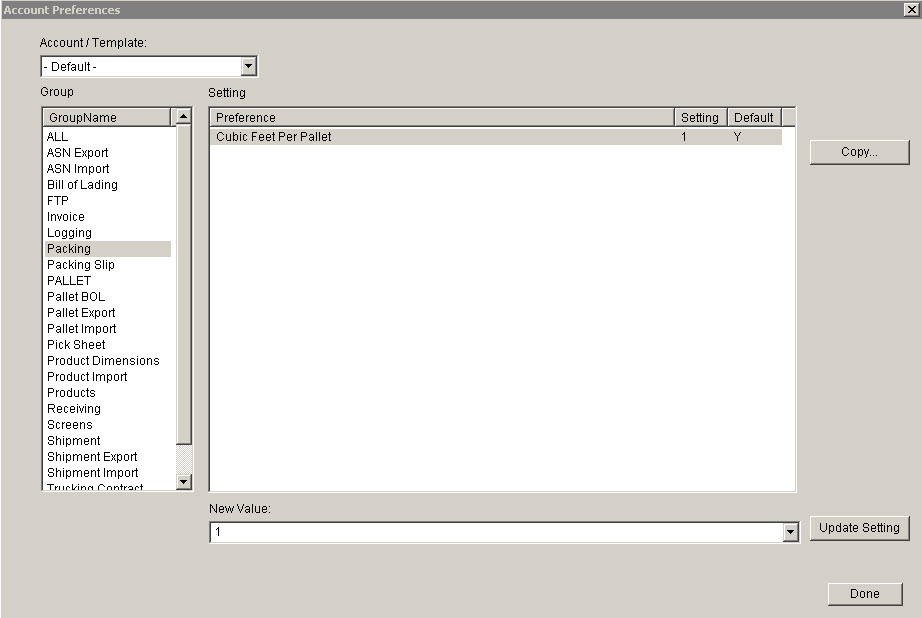
Update 22 Init 19
Pallet BOL (back to top)
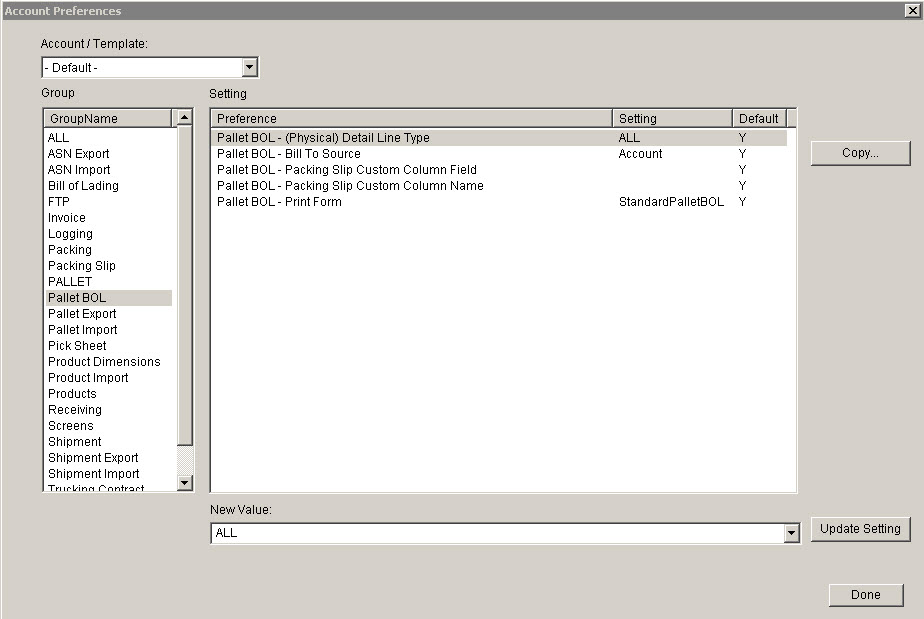
Update 22 Init 19
Pallet Export (back to top)
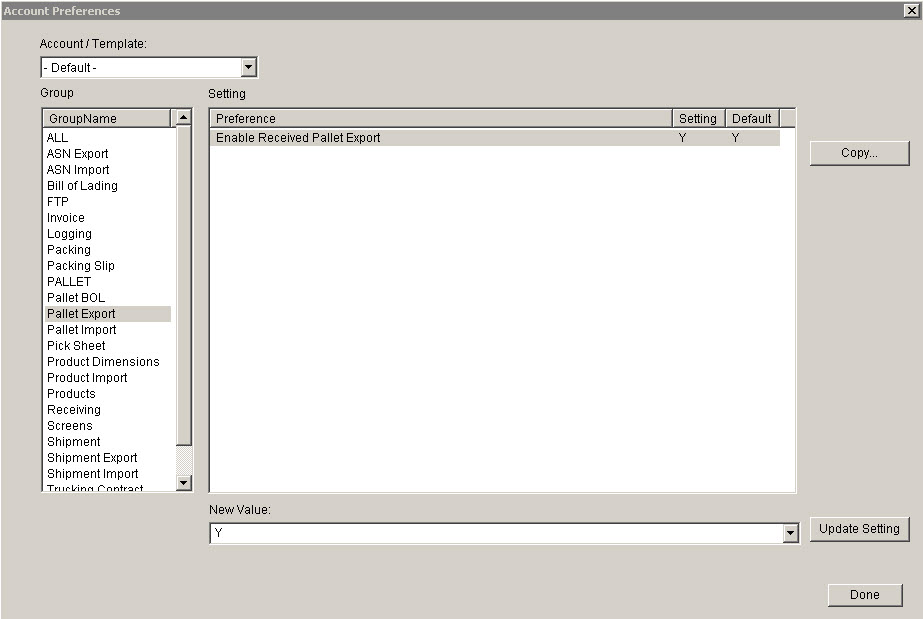
Update 22 Init 19
Pallet Import (back to top)
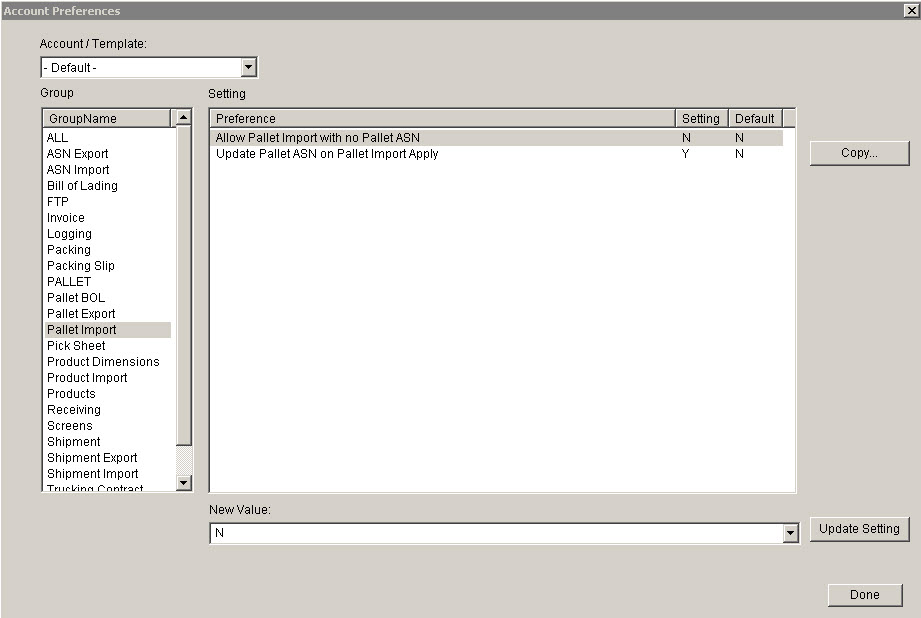
Update 22 Init 19
- Allow Pallet Import with no Pallet ASN
- If set to N (default), the Error column on the Apply Pallet Import Screen will be Yes if the CFX ASN# field is blank.
- If set to Y, the CFX ASN is not required before Applying Pallets.
- Update Pallet ASN on Pallet Import Apply
- If set to Y, the Pallet ASN will be updated based on the Pallets imported.
Pick Sheet (back to top)
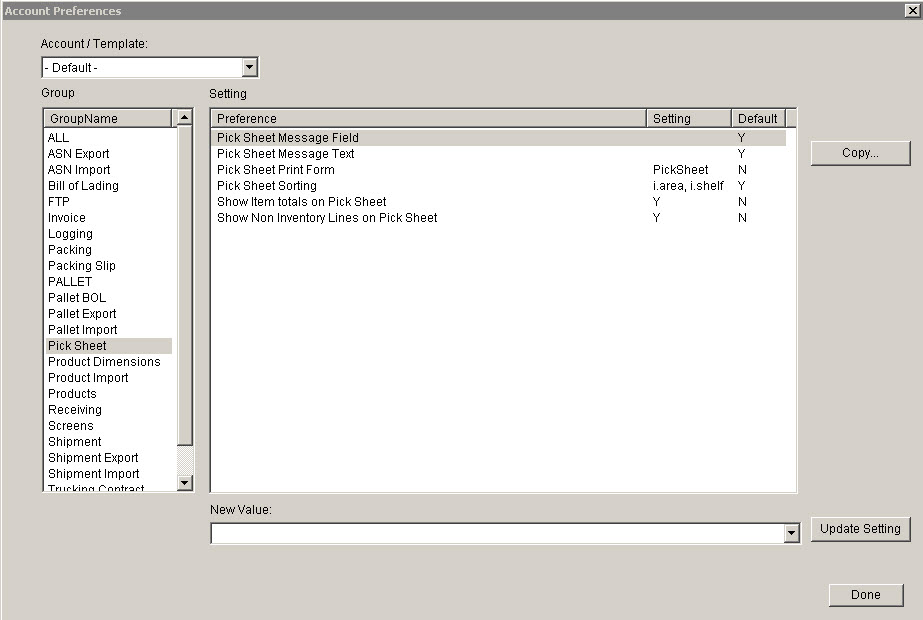
Update 22 Init 19
Product Dimensions (back to top)
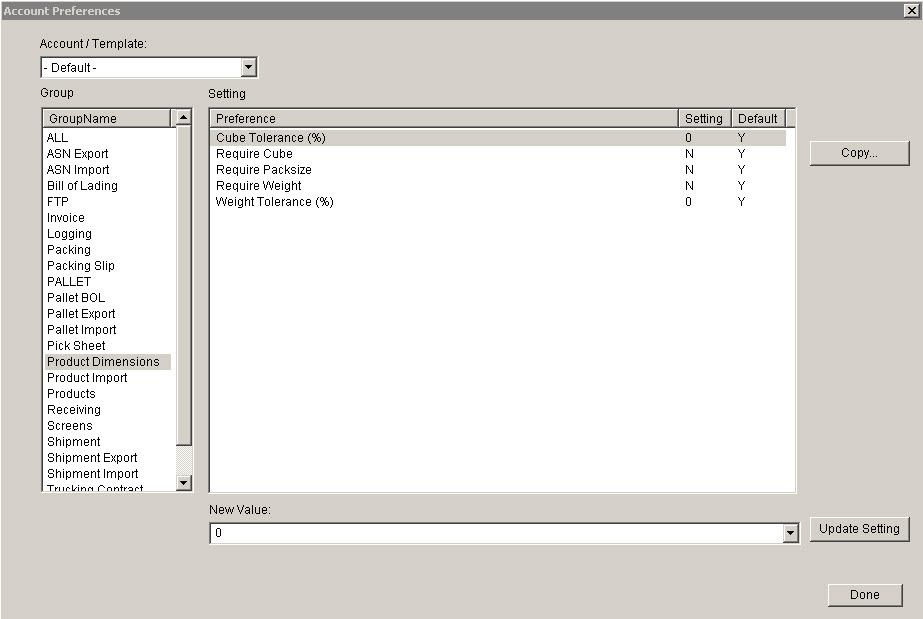
Update 22 Init 19
Product Import (back to top)
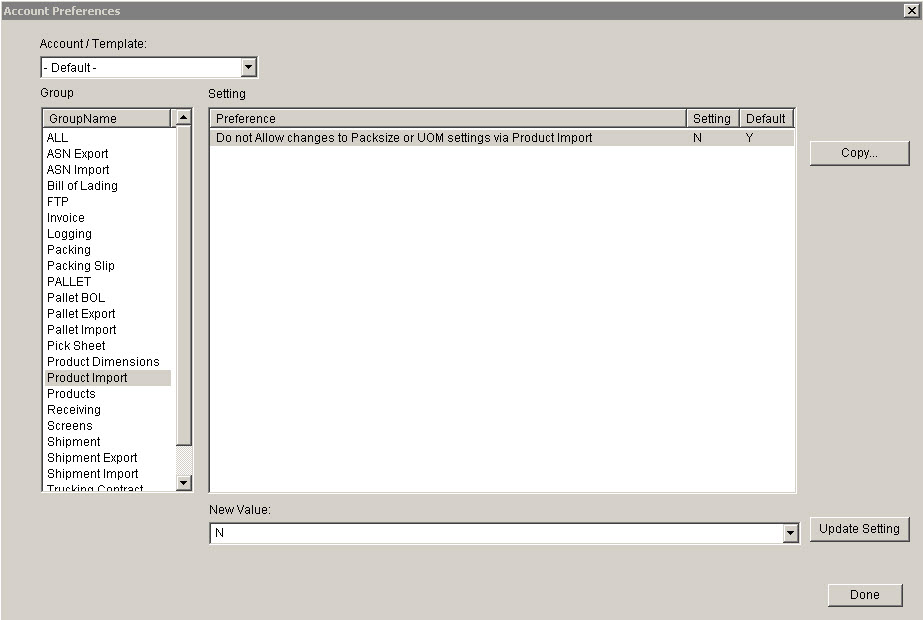
Update 22 Init 19
Products (back to top)

Update 22 Init 19
Receiving (back to top)
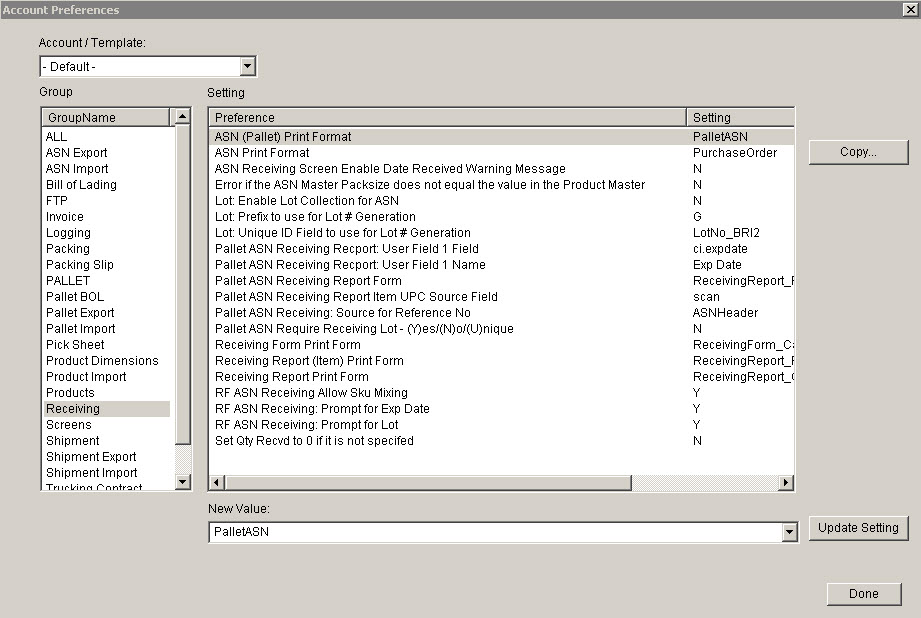
Update 22 Init 19
Screens (back to top)
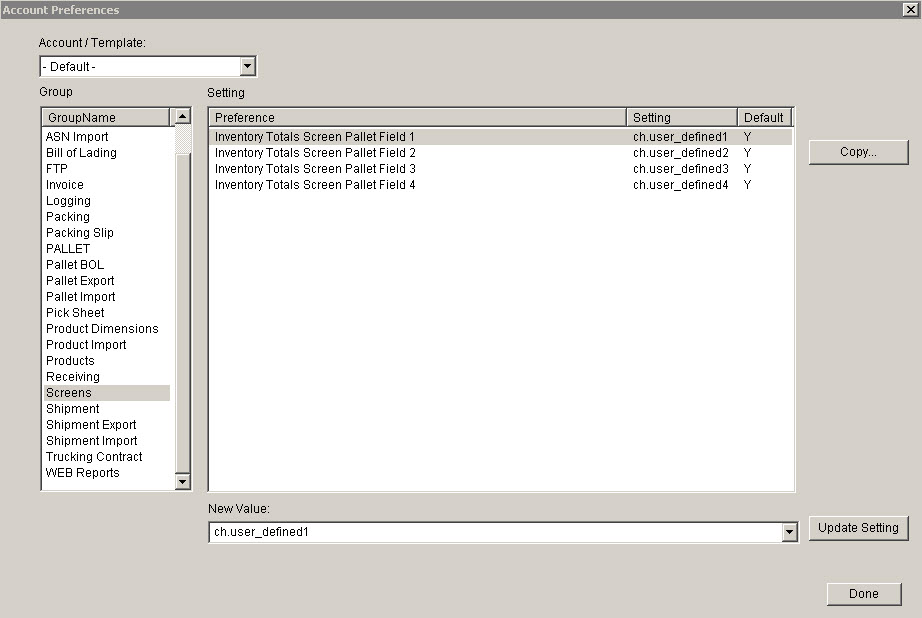
Update 22 Init 19
Trucking Contract (back to top)
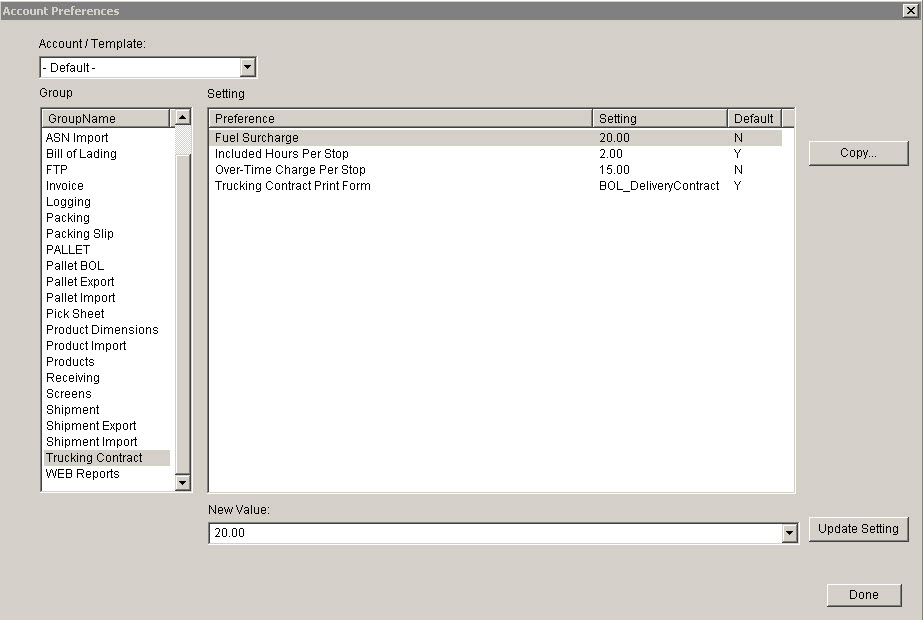
Update 22 Init 19