Connecting to QuickBooks
In order for COREflex™ to communicate with QuickBooks®, you MUST have QuickBooks® and COREflex™ running concurrently on the same computer. Before COREflex™ can start retrieving data from QuickBooks®, the QuickBooks Administrator of your company needs to grant permission for COREflex™ to do so (see below).
STEPS TO COMPLETE IMPORT FROM QUICKBOOKS:
- Open you company file and log in to QuickBooks®. If this is the first time that you are importing from this company file, you MUST be logged in as 'Admin'. Otherwise, if you have allowed other users to use Coreflex to connect to Quickbooks®, you may log in as any user that has the appropriate permissions.
- Start up Coreflex™ software and log in.
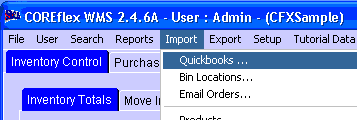
- Click on Import and select "QuickBooks" under its sub-menu, like shown below,

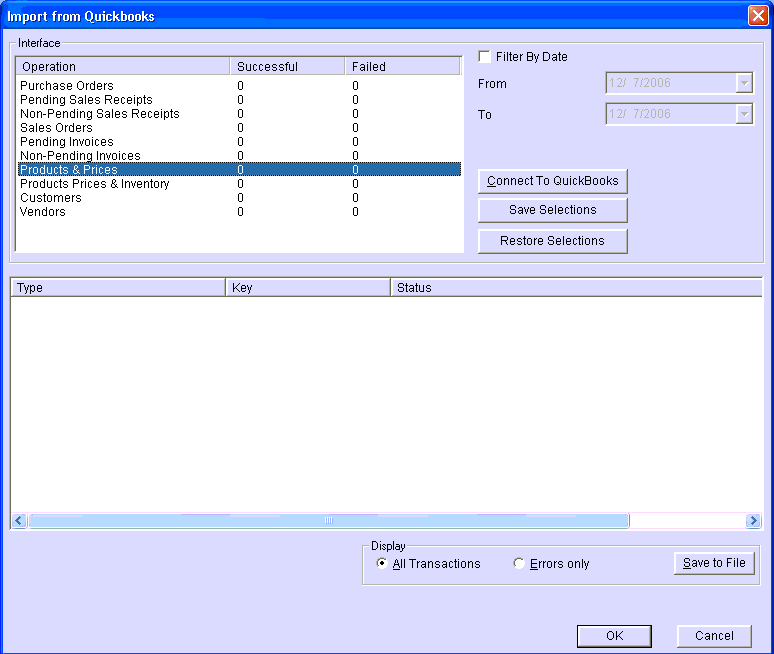
- The window below will show up. For this example, we will import products from Quickbooks, but this procedure can be done using any of the options listed in the upper left-hand portion of this window. Click on "Products & Prices" to select it, uncheck "Filter By Date", so that all products are imported regardless of the date they were last changed and then click on "Connect to QuickBooks"

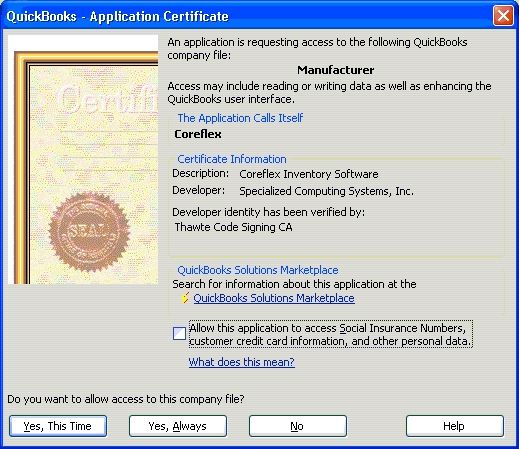
- If you have not already granted Coreflex access to this company file, you will be brought back to your QuickBooks software and with the following window showing up on your screen,

- Click "Yes, Always" if you wish to allow users other than the Quickbooks Admin user to connect to Quickbooks in the future.
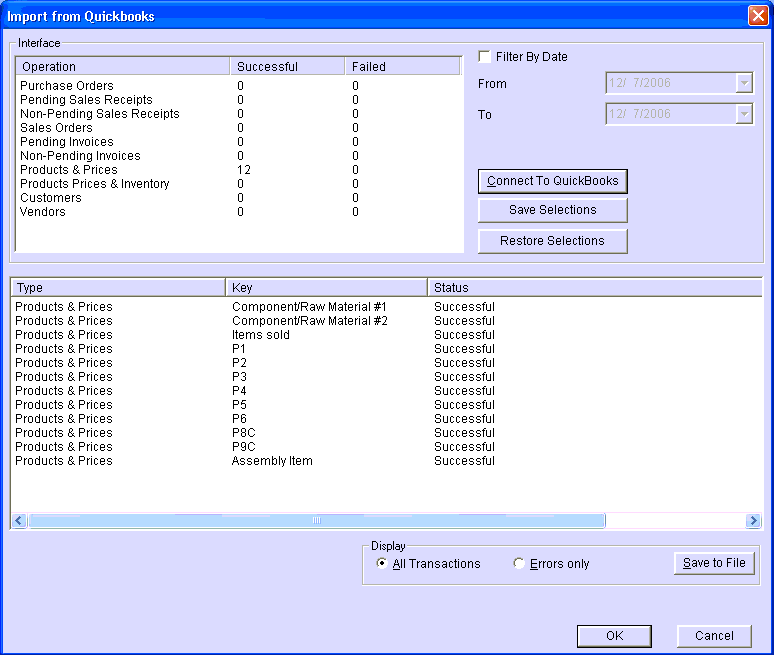
- COREflex™ will now start importing the Products and its Price information over to COREflex™ since we have chosen "Products & Price" option in step 6. After it has successfully imported the product information, it will display a list of items with the status for each product, as shown in the figure below.

- You can proceed to carry on to import other options such as Purchase Orders, Sales Receipts, Sales Orders, Invoices, Invnetory, Customers and Vendors.