WO Processing and Labor Tracking High Level Instructions
This flow requires Feature Capture Labor an uses the Coreflex Screen application and the RF Terminal to collect the parts and labor used when completing a Work Order for a Customer.
Step 1: Enter the
Work Order Information.
This is done on the Work Orders Entry Edit Screen.
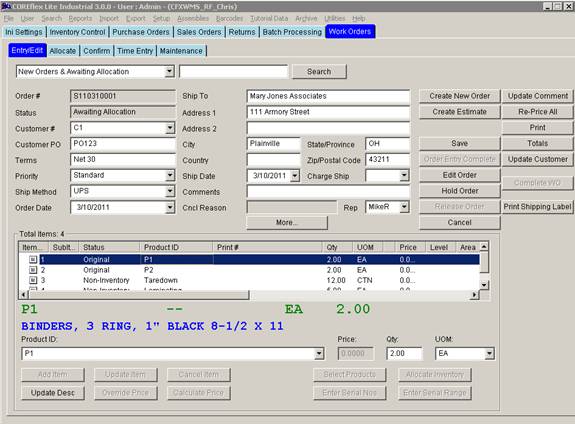
The Work Order Number can either be the Order #, or come from a field in the Work Order. This is determined by the System Setting Labor: Order Field to Match On.
Parts and Services can be added using the Select Products Screen. Services will appear with a status of Non-Inventory.
Step 2: Create an Estimate
This is done on the Create Estimate screen. Enter the screen by Clicking Create Estimate on the Work Order Entry screen.
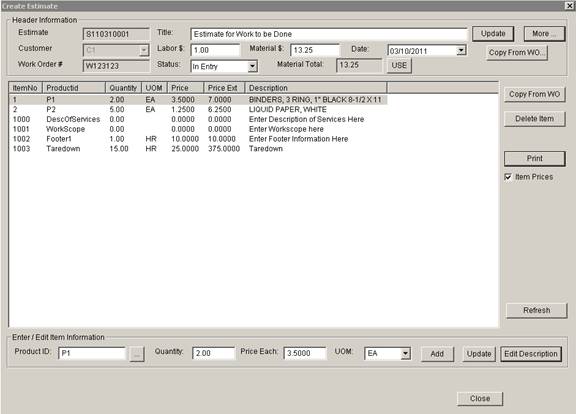
In the Header Information you can:
Enter text for a Title, values for Labor and Material and an estimate date (click update to accept).
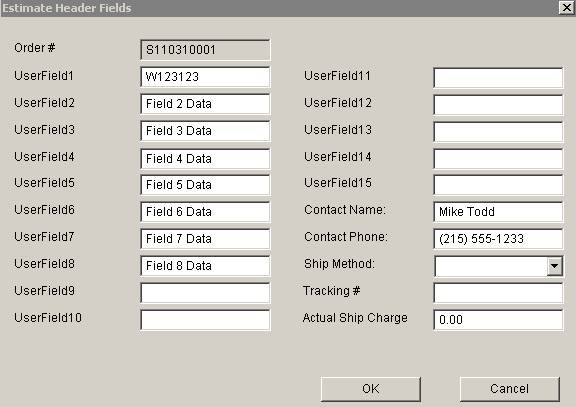
Edit the Estimate Header Data by clicking the More Button.
Here is the Header data set up for this example:
Update the Status of the Estimate (click Update to accept).
Copy the header from the WO by clicking the Copy From WO button.
Set the Material $ to the Material Total by using the USE button (click Update to accept).
When the Estimate is first created, three items will automatically be inserted: DescOfServices, WorkScope, and Footer1.
In the Item section you can:
Use the Copy from WO Button to copy the services and parts entered on the Work order.
Add, Edit and Delete WO Items.
Print the Estimate. SAMPLE
Step 3: Release the Work Order for Time Entry and
Picking.
This is done on the Work Orders Entry Edit Screen by clicking Order Entry Complete.
Step 4: Capture Labor against the Work Order
This can be done by either the Coreflex Program or the RF Terminal.
RF Terminal Methodology:
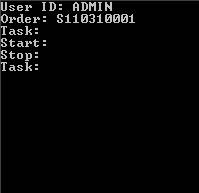
From the main menu in the RF select Capture Labor. Enter a 1 to begin labor capture. The following screen appears:
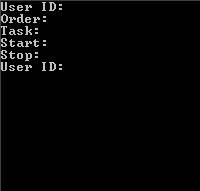
The user scans or enters his user id and the work order #:
The user scans or enters the task being performed:
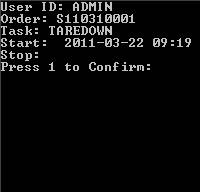
The current time is used for the Start Time of the Task. The user enters a 1 to confirm that the task has begun.
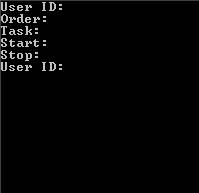
The screen is now ready to go back and allow more tasks to be started by others. When a user has completed their task, they scan their user id and the work order task they had started appears on the screen.
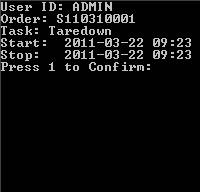
They will enter a 1 to confirm they are done and the screen goes back to asking for a user id.