PURCHASE ORDERS - PUT-AWAY - MULTIPLE ITEMS SCREEN
 Update
22 Init 12
Update
22 Init 12
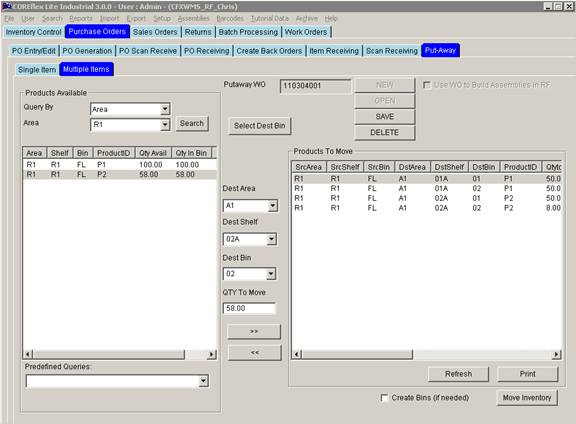
1.0 This screen is used to create Move Work Orders (WOs) which can be printed and confirmed either on this screen or by the RF Terminal.
2.0 Fields
2.1 Query
By and Query Data Drop
2.2 Dest Area, Dest Shelf, and Dest Bin. Use these drop downs to select a destination location for the move. These fields will be populated automatically if the Select Dest Bin Button is used.
3.0 Buttons
3.1 New. Creates a New WO. The number is automatically assigned.
3.2 Open. Displays a dialog which will list all the un-confirmed Work Orders. Select a WO from the list to open and the remaining moves will be displayed in the right list.
3.3 Save. Saves the WO and clears the screen. Use the Open button to bring it back up on the screen.
3.4 Delete. Deletes the WO currently displayed.
3.5 Search. See description of the Query By and Query Data Drop fields above.
3.6 Select Dest Bin. Opens the Choose Location dialog which allows the selection of a Destination Location. When a location is selected, it will be populated in the Dest Area, Dest Shelf, and Dest Bin fields.
3.7 Refresh. Refreshes the lists on the screen.
3.8 Print. Prints the Work Order. The print format is specified in the System Setting Move Work Order Print Format.
3.9 Move Inventory. Performs the Inventory Moves highlighted in the right list. Moved items are removed from the screen when successfully completed. When all moves are completed, click the Save Button to remove the Work Order from the screen.