ITEM RECIVING
This function allows you to Receiving Iventory by scanning products individually and the locations they are being received into.
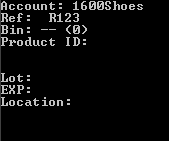
- Below is the first screen which is displayed after selecting Item Receiving on the Receiving Menu. Note that the Lot and EXP Dates are only displayed if Feature Lot Control in enabled.
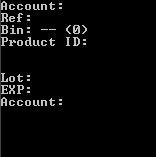
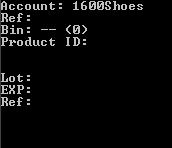
- Scan or Enter the Reference # associated with the Receipt.
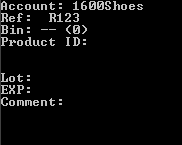
- Scan or enter a Comment for the Receipt. This prompt is skipped unless the Item Receiving Comment Prompt is enabled on the RF Interface Setup Prompts Screen. If the Prompt is disabled, the next enabled prompt will be displayed.
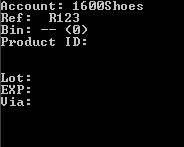
- Scan or enter the Shipping Method the material was received by. This prompt is skipped unless the Item Receiving Ship Method Prompt is enabled on the RF Interface Setup Prompts Screen. If the Prompt is disabled, the next enabled prompt will be displayed.
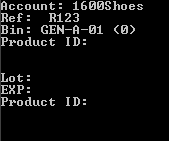
- Scan or enter the Location that the material is to be received into. If entering, the Area, shelf , and bin should be separated by dashes.
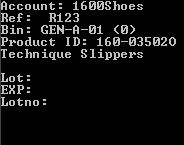
- Scan the Productid to be received.
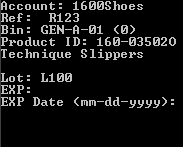
- If Feature Lot Tracking is enabled and the Lot Prompt is Enabled on the RF Interface Setup Prompts Screen, the Lot will be prompted for next. If there is no Lot associated with the product, enter a space in this field.
- If Feature Lot Tracking is enabled and the Exp Date Prompt is Enabled on the RF Interface Setup Prompts Screen, the Expiration Date will be prompted for next. If there is no Expiration Date associated with the product, enter a space in this field. Other wise, enter the date in the format shown.
- Enter the Qty to be received of the item. This prompt is skipped unless the Item Receiving QTY Prompt is enabled on the RF Interface Setup Prompts Screen. If the Prompt is disabled, it is assumed that a qty of 1 is received and the Qty prompt is skipped.

- Qty will be prompted for again. Hit Enter to get back to the Location or Product prompt to make the next receipt.