Loading and Overlaying Inventory
These instructions are for loading inventory from a file and overlaying the existing inventory (if any) in Coreflex.
Step One: Remove any Inventory Counts.
Go to the Apply Counts Screen as shown below:
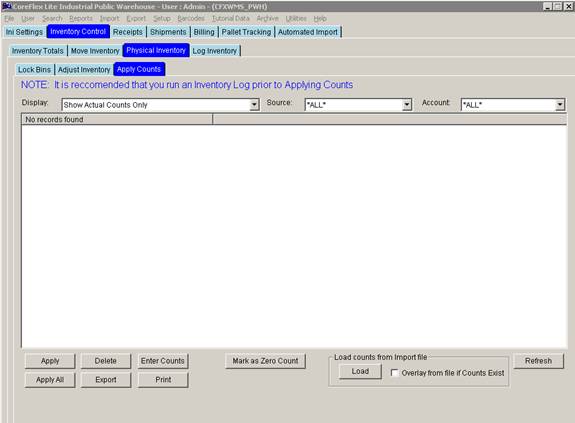
Confirm the Display Drop Down is set to “Show Actual Counts Only” and click refresh.
Highlight any counts that appear and click the Delete button to remove them.
Step Two: Remove the Current Inventory.
Change the Display drop down to Show All, change the Account drop down to the Account you are working with and click Refresh. All of the current inventory in Coreflex for the Account will be displayed. Highlight the records and click “Mark as 0 Count”. This creates counts of 0 for all the highlighted records.
With all of the records highlighted, click the Apply button. This will zero out all of the inventory in Coreflex.
Step Three: Import the Inventory File.
From the Import menu select Inventory… The Import Inventory dialog will open.
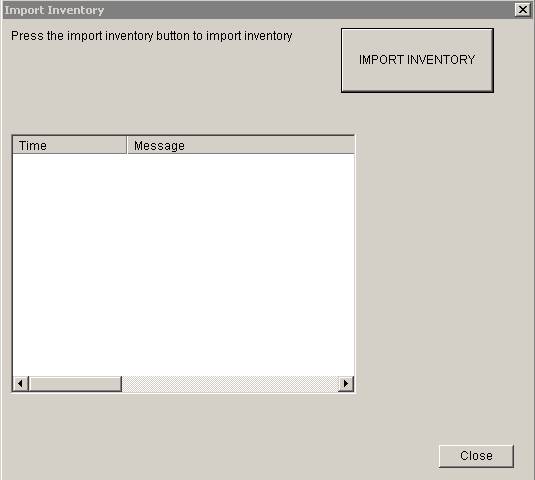
Click the Import Inventory button. A dialog will open allowing you to search for the File to be imported. Select the file and click Open. The screen will indicate that the import was successful or it will give you a line # for the first failure.
Note that if you used Excel to create the file, you need to save the file as a Comma Separated Variable (.csv) file. Do this using the Save As function in Coreflex. If there are multiple sheets in the Excel Workbook, you will have to create a file for each sheet.
Step Four: Correct Errors and Apply the Inventory
From the Import Menu select Apply Inventory. The Apply Inventory Screen will appear.

Select the account whose inventory is being imported from the Assign Account Drop down, highlight the all of the records on the screen, and click the Assign Account Button. When the screen refreshed the Account Prefixes will have been added to the Products.
If the Error column is set to Yes for a record, the inventory in that record will not import. Asterisks’ around a column indicate there is an issue with that column.
ProductId – Asterisks here indicate the product does not exist in Coreflex and must be added.
Area, Shelf, Bin – Asterisks here indicate the location does not exist in Coreflex. Click the Add Locations button to add them. When doing this you will be prompted for a location type. If unsure, choose a location type of Picking Unslotted.
Cube, Weight, Packsize – These will show errors if they do not match the product master (the product master values are shown in parenthesis). You can use either the Set Cube Weight Packsize from Master or the Set Master Cube Weight Packsize from file buttons to correct this.
If the error column indicates Yes-Dup it means that you have more than one record in the file for the same location and productid. Because location and productid uniquely identifies an inventory record, it can not be loaded twice.
If the error column indicates Yes-Exist it means that the inventory already exists in the system. This should not happen if you removed the entire inventory as indicated in one of the previous steps above.
Highlight the inventory records and click the Apply button to create the inventory. Once a record is applied, it will be removed from the screen.